
Friendship bracelets are a timeless craft symbolizing bonds and creativity․ With printable friendship bracelet instructions pdf‚ anyone can learn to make these meaningful accessories‚ perfect for sharing with loved ones․
What Are Friendship Bracelets?
Friendship bracelets are handmade accessories crafted from threads or yarns‚ symbolizing friendship and connection․ They can be simple or intricate‚ often featuring knots and patterns․ Typically made from embroidery thread‚ floss‚ or yarn‚ these bracelets are personalized with colors and designs․ They are exchanged as heartfelt gifts‚ representing bonding and thoughtfulness․ With printable friendship bracelet instructions pdf‚ anyone can create these meaningful tokens‚ making them a popular and enduring craft for all skill levels․
The Significance of Friendship Bracelets
Friendship bracelets hold deep emotional and cultural significance‚ symbolizing trust‚ loyalty‚ and lasting bonds․ Often handmade with care‚ they represent the effort and thoughtfulness invested in a relationship․ These bracelets are not just accessories but meaningful tokens exchanged between friends and loved ones․ Their intricate designs and personalized colors reflect the uniqueness of each connection․ Beyond their aesthetic appeal‚ they embody a sense of togetherness and mutual appreciation‚ making them a cherished tradition across generations and cultures․
Materials Needed for Making Friendship Bracelets
Essential materials include colorful yarn‚ embroidery thread‚ scissors‚ and tape․ A printable friendship bracelet instructions pdf often provides a detailed list and step-by-step guidance for crafting․
Essential Supplies

To begin‚ gather embroidery floss in various colors‚ sharp scissors‚ and clear tape for securing threads․ A clipboard or sturdy surface helps keep your work tidy․ Include a measuring tool for consistent lengths and fabric glue for finishing touches․ These basics‚ along with a printable friendship bracelet instructions pdf‚ ensure you’re prepared to craft intricate designs․ Always choose high-quality floss for durability and vibrant colors‚ making your bracelet a lasting keepsake․
Optional Materials for Customization
Enhance your bracelet with beads‚ sequins‚ or small charms for added flair․ A beading needle simplifies threading beads onto floss․ Sequins or glitter thread can add sparkle‚ while fabric paint or markers allow for unique designs․ A charm spacer ensures evenly spaced decorations․ These optional materials‚ combined with a printable friendship bracelet instructions pdf‚ let you personalize your bracelet‚ making it truly special and reflective of your style or the recipient’s preferences․
Understanding Basic Knots
Mastering basic knots is essential for creating friendship bracelets․ The forward and backward knots are foundational‚ forming the basis of all patterns․ These knots‚ covered in a printable friendship bracelet instructions pdf‚ help you create intricate designs and ensure a secure bracelet․
Forward Knot
The forward knot is a fundamental technique in making friendship bracelets․ It involves crossing one string over the other and tucking the end under to create a secure loop․ This knot is the starting point for most patterns and ensures the bracelet holds together․ A printable friendship bracelet instructions pdf typically includes visual guides to help master this essential knot․ Practice the forward knot to build a strong foundation for more complex designs and patterns in your bracelet-making journey․
Backward Knot
The backward knot is the reverse of the forward knot‚ creating a mirror image in your design․ To make it‚ cross the string in the opposite direction and tuck the end under․ This knot is crucial for patterns like chevrons or spirals․ A printable friendship bracelet instructions pdf often includes diagrams to illustrate this technique․ Mastering the backward knot adds symmetry and texture to your bracelet‚ ensuring a balanced and professional finish․ Practice this knot to enhance your pattern-making skills․
How to Combine Knots
Combining knots allows you to create intricate designs in your friendship bracelet․ Start by mastering the forward and backward knots‚ then experiment with alternating them․ This creates patterns like chevrons or stripes․ A printable friendship bracelet instructions pdf often provides visual guides for knot combinations․ By varying the sequence and tension‚ you can achieve different textures and styles․ Practice blending knots to unlock endless creative possibilities and add unique flair to your bracelet designs․

Popular Friendship Bracelet Patterns
Popular patterns include stripes‚ chevrons‚ and hearts‚ offering endless creativity․ These designs are widely featured in printable friendship bracelet instructions pdf for easy crafting․
Basic Stripe Pattern
The basic stripe pattern is a timeless and straightforward design‚ perfect for beginners․ It involves creating parallel lines of color by using forward and backward knots․ This pattern is widely featured in printable friendship bracelet instructions pdf‚ offering clear step-by-step visuals․ The simplicity of stripes allows for easy customization with different colors‚ making it a favorite among crafters․ With practice‚ this pattern can be completed quickly‚ making it ideal for those new to bracelet-making․ Its versatility ensures it remains a popular choice for all skill levels․
Advanced Chevron Pattern
The advanced chevron pattern offers a sleek‚ modern look with its inverted V designs․ Found in many printable friendship bracelet instructions pdf‚ this pattern requires alternating forward and backward knots to create the signature zigzag effect․ It’s ideal for those comfortable with basic knots and seeking a challenge․ To achieve symmetry‚ crafters often use a mirror technique or reverse knotting․ This pattern is popular for its visual appeal and versatility in customization․ With practice‚ it becomes a standout piece in any collection‚ showcasing skill and creativity․
Heart Pattern Tutorial
The heart pattern tutorial is a beloved design in printable friendship bracelet instructions pdf‚ perfect for expressing love or friendship․ It involves creating interconnected heart shapes using forward and backward knots․ The pattern starts with a base of two colors‚ then builds up by crossing strands to form the heart silhouette․ Tips include keeping knots tight for definition and measuring length beforehand․ With practice‚ this design becomes a charming symbol of affection‚ ideal for gifting or personal wear․
Step-by-Step Instructions
Printable friendship bracelet instructions pdf offers a detailed guide covering essential steps‚ from preparing strings to knotting techniques․ Follow clear diagrams to start‚ add patterns‚ and finish your bracelet perfectly․
Preparing the Strings
To begin‚ cut several strands of embroidery floss or cotton thread‚ each approximately 36-40 inches long․ Fold the strands in half and tie a knot at one end to create a loop․ Secure the folded strings to a stable surface using tape or a clipboard․ Arrange the strings in the desired order‚ ensuring they are evenly spaced and not tangled․ Trim any excess length to make handling easier; This setup provides a neat starting point for your bracelet design․
Starting the Bracelet

Begin by tying a forward knot on the leftmost string‚ looping it around the adjacent strand․ Pull gently to secure‚ forming the first stitch․ Repeat this process‚ moving right across the strings to create the base row․ This foundational row establishes the bracelet’s structure․ Keep the knots tight but not overly taut to maintain an even weave․ This initial row sets the stage for adding patterns and designs in subsequent steps․ Ensure alignment for a polished look․
Adding Patterns and Designs
To add patterns‚ alternate between forward and backward knots on adjacent strings․ For stripes‚ knot two strands of the same color sequentially․ Experiment with chevrons by reversing knot directions midway․ Introduce beads by threading them onto strings before knotting․ Follow the printable guide for intricate designs‚ ensuring each step aligns for visual balance․ Practice consistency in tension to maintain even spacing․ This step transforms a simple bracelet into a personalized‚ artistic piece reflecting your creativity and skill․
Finishing the Bracelet
To complete your bracelet‚ tie a secure knot at the end‚ ensuring all strands are tightly bound․ Trim the excess string close to the knot for a clean look․ Apply clear nail polish to seal the knot and prevent unraveling․ Tuck the ends under the bracelet and add a dab of glue for extra security․ Allow the polish and glue to dry completely before wearing or gifting․ This finish ensures durability and a polished appearance for your handmade bracelet․
Tips for Beginners
Common Mistakes to Avoid
Start with simple patterns and use a clipboard to hold strings steady․ Keep tension even to avoid loosening․ Practice knots before beginning a design․
Beginners often make mistakes like uneven tension‚ which can loosen the bracelet․ Incorrect knotting is another issue—ensure forward and backward knots are done properly․ Starting over due to small errors can be frustrating; instead‚ learn to fix mistakes as you go․ Not anchoring the strings securely can lead to a tangled mess․ Using too many colors without a clear pattern can make the bracelet look messy․ Practice basic knots before diving into complex designs to build confidence and skill․
How to Fix Errors
Identify the mistake early to avoid unraveling the entire bracelet․ Gently pull strings to loosen knots without damaging the pattern․ If a knot is misplaced‚ reverse it by looping the string in the opposite direction․ Use a needle to weave loose ends back into the design․ Small errors can often be corrected by adjusting nearby knots․ Practice patience and don’t be afraid to start over if needed—each attempt improves your skill and confidence in crafting friendship bracelets․
Best Practices for Crafting
Work in a well-lit‚ distraction-free area to maintain focus․ Use high-quality materials like waxed cords or embroidery floss for durability․ Keep strings organized by separating them into small bundles․ Practice basic knots before starting complex designs․ Maintain consistent tension to ensure a snug fit․ Take breaks to avoid fatigue and maintain precision․ Refer to your printable guide frequently to stay on track․ Clean your workspace regularly to prevent tangles and lost supplies․ Patience and consistency are key to creating beautiful friendship bracelets․

Customizing Your Bracelet
Use patterns and colors from your printable guide to create unique designs․ Add beads or charms for personal touches․ Experiment with initials or symbols for a personalized feel․ Keep it balanced by limiting embellishments to avoid overwhelming the design․
Choosing Colors
Selecting colors is a key part of personalizing your bracelet․ Use a printable guide to explore color schemes and combinations․ Consider the recipient’s favorite hues or meaningful colors․ Complement colors like blue and orange‚ or contrast with bold and neutral tones․ Themes like seasonal colors or monochromatic designs can add style․ Ensure the colors align with the pattern and beads chosen․ Experiment with different palettes to create a unique and thoughtful piece that reflects personality or friendship․
Adding Beads or Charms
Beads or charms add personality to your bracelet․ Choose beads that match the colors or theme of your design․ Letters‚ symbols‚ or small trinkets can add meaning․ Space beads evenly or cluster them for visual interest․ Use a needle to thread beads onto strings‚ securing them with knots․ For a polished look‚ add beads between patterns․ Printable guides often include bead placement tips․ Experiment with different combinations to make your bracelet unique and meaningful‚ reflecting the wearer’s style or preferences․
Personalizing the Design
Personalizing your friendship bracelet makes it extra special․ Choose colors that represent the wearer’s personality or favorite hues․ Incorporate patterns that hold meaning‚ like symbols or initials․ Consider adding names‚ dates‚ or meaningful phrases using letter beads․ Mix and match textures by combining embroidery floss with yarn or ribbon․ Customization allows you to tailor the bracelet to the recipient’s style‚ making it a thoughtful and unique gift․ Printable guides often include tips for personalizing your design effectively․
History of Friendship Bracelets
Friendship bracelets trace back to Central America’s Maya and Aztec civilizations‚ symbolizing unity and spirituality․ Traditionally crafted with leather and beads‚ they remain popular today as handmade tokens of friendship and cultural heritage․
Origins and Cultural Significance
Friendship bracelets have deep roots in Central American cultures‚ dating back to the Maya and Aztecs‚ who used them as symbols of unity and friendship․ Traditionally‚ these bracelets were handmade using leather‚ beads‚ and woven threads‚ carrying spiritual and emotional significance․ Over time‚ they became a global phenomenon‚ with modern designs often inspired by ancient patterns․ Their cultural importance lies in their ability to represent bonds between people‚ transcending time and geography․ The tradition continues today‚ with many crafting them as heartfelt gifts․
Evolution Over Time
Friendship bracelets have evolved significantly since their origins in Central America․ Initially made from simple materials like leather and beads‚ they gained global popularity in the 1970s and 1980s․ The rise of embroidery floss and DIY trends made them accessible to everyone․ Today‚ modern designs incorporate beads‚ charms‚ and intricate patterns․ The internet has further popularized them‚ with printable PDF guides offering step-by-step instructions․ This evolution reflects changing craft trends while maintaining the timeless symbolism of friendship and connection․

Downloading and Printing Instructions
To download and print friendship bracelet instructions‚ search for “printable friendship bracelet instructions PDF” online․ Select your preferred design‚ download the file‚ and print it on standard paper for easy crafting guides․
Where to Find Printable Guides
Printable friendship bracelet instructions can be found on various crafting websites‚ Etsy‚ and Pinterest․ Websites like Google‚ Etsy‚ and Pinterest offer a wide range of free and premium PDF guides․ Simply search for “printable friendship bracelet instructions PDF” and browse through the results․ Many websites provide step-by-step tutorials with visual aids‚ ensuring easy understanding․ Whether you’re a beginner or an experienced crafter‚ these guides are readily available to help you create beautiful bracelets․
How to Print the Instructions

To print friendship bracelet instructions‚ ensure your computer is connected to a printer․ Download the PDF guide from a reliable source․ Open the file using a PDF viewer like Adobe Acrobat․ Select the print option‚ choose your printer‚ and adjust settings if needed․ Use high-quality paper or cardstock for clarity․ Double-check the page layout and margins before printing․ Ensure the instructions are legible and include all images or diagrams․ Print in color for better visual guidance‚ if available․

Sharing Your Finished Bracelet
Sharing your finished bracelet is a heartfelt way to connect with others․ Whether gifting or showcasing online‚ it spreads joy and strengthens bonds․
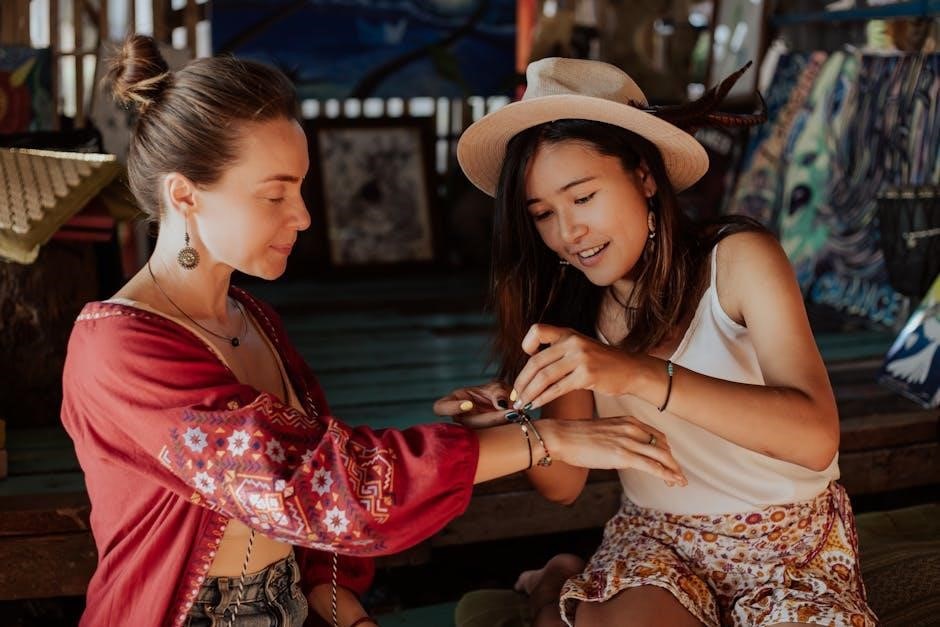
Giving as a Gift
Giving a handmade friendship bracelet as a gift is a meaningful way to show appreciation and care․ It symbolizes lasting bonds and thoughtfulness․ Pair it with a personalized note or a small memento for extra charm․ Consider packaging it in a decorative box or bag to enhance the presentation․ If you used a printable friendship bracelet instructions PDF‚ you could even include it as a bonus for the recipient to create their own․ This gesture adds a personal touch and encourages them to share the tradition․
Showing Off Your Creation
Showcasing your finished bracelet is a great way to share your creativity․ Post photos on social media or display it at craft fairs to inspire others․ If you used a printable friendship bracelet instructions PDF‚ you can include it as part of your display‚ showing the process behind your work․ This adds context and appreciation for the craftsmanship․ Sharing your creation can spark conversations and encourage others to try making their own‚ fostering a sense of community and shared passion for handmade crafts․
Crafting friendship bracelets is a meaningful way to express creativity and connect with others․ Using a printable friendship bracelet instructions PDF ensures success for all skill levels‚ fostering joy and confidence in your handmade creations․
Final Thoughts

Crafting friendship bracelets is a rewarding hobby that combines creativity with meaningful connections․ Using a printable friendship bracelet instructions PDF simplifies the process‚ ensuring clarity and precision․ Whether you’re a beginner or an experienced crafter‚ these guides provide a foundation for learning and experimentation․ The joy of creating something handmade lies not only in the process but also in the ability to share it with others․ Embrace the simplicity and versatility of friendship bracelets‚ and let your creativity shine through every stitch and knot․ Happy crafting!
Encouragement to Keep Crafting
Embrace the joy of creating friendship bracelets and let your passion for crafting grow․ Every bracelet tells a story‚ and with practice‚ your skills will improve․ Don’t be afraid to experiment and try new patterns—each mistake is a learning opportunity․ Share your creations with friends and family to inspire others․ Crafting is a journey of creativity and connection‚ so keep exploring‚ stay patient‚ and enjoy the process of making something truly special․