
Instructional drawing centers on building forms from basic shapes, emphasizing foundational skills and anatomical understanding for accurate representation.
Consistent practice, starting with life drawing, is crucial for improvement, despite initial challenges; mastering shapes unlocks artistic potential.
What is Instructional Drawing?
Instructional drawing isn’t merely replicating what you see; it’s a methodical approach to understanding how to draw. It’s fundamentally about deconstructing complex subjects – particularly the human figure – into their simplest geometric components. This process involves recognizing that everything, from a hand to an entire body, can be built from cubes, spheres, and cylinders.
You can’t accurately depict something you don’t comprehend structurally. Therefore, a core tenet is studying anatomy and form, realizing how much we often overlook about our own bodies’ underlying shapes. It’s a journey of learning to ‘see’ beyond the surface.
The Importance of Foundational Skills
Developing strong foundational skills is paramount in instructional drawing. Mastering basic shapes isn’t just an exercise; it’s the bedrock upon which all representational art is built. Without this understanding, attempts at figure drawing will likely fall short, appearing inaccurate or disjointed.
Consistent practice, even when initial results are discouraging, is absolutely essential. Embrace the “suckiness” of early drawings – it’s a necessary step. The more you draw, the faster you’ll improve, building muscle memory and visual acuity.
Understanding Basic Shapes in Drawing
Geometric shapes – cubes, spheres, cylinders – are fundamental building blocks for constructing complex forms, especially within human anatomy and figure drawing.
Geometric Shapes as Building Blocks
Mastering basic geometric shapes is paramount in instructional drawing, serving as the foundational elements for constructing any subject, particularly the human figure. Learning to perceive and replicate these forms – cubes, spheres, cylinders, and cones – allows artists to deconstruct complex objects into manageable components.
This approach simplifies the drawing process, enabling accurate representation of form and volume. Understanding how these shapes interact and overlap is key to building believable structures, ultimately improving observational skills and artistic proficiency.
Applying Shapes to Human Anatomy
Successfully applying geometric shapes to human anatomy unlocks a deeper understanding of the body’s structure. Recognizing how muscles and bones approximate cylinders, spheres, and blocks simplifies the depiction of complex forms. You can’t accurately draw what you don’t understand; anatomical study is vital.
This method allows artists to build the figure from a solid foundation, ensuring correct proportions and believable volume. It’s surprising how little one knows about their own body’s shape!
Constructing Forms from Simple Shapes
Mastering the art of construction begins with light sketching and simplification, breaking down objects into their most basic geometric components. This initial phase is crucial; avoid drawing too hard initially, and don’t skip it! Gradually add detail, building upon the foundational structure.
This incremental approach fosters accuracy and prevents overwhelming complexity. Remember, everything can be constructed from simple shapes – a core principle of effective drawing.

Figure Drawing Fundamentals
Figure drawing demands consistent practice, even when initial attempts are discouraging; drawing from life is paramount, forming the bedrock of skill development.
The Necessity of Practice
Consistent practice is absolutely vital in figure drawing; improvement won’t materialize without dedicated effort. Accept that your earliest drawings will likely be unsatisfactory, and resist discouragement. Embrace the process, understanding that each attempt builds upon the last, gradually refining your skills and understanding.
The more you draw, the faster you’ll progress, diminishing the time required to achieve noticeable improvements. Don’t shy away from the initial struggles – they are an inherent part of the learning journey.
Dealing with Initial Challenges
Expect initial frustration; your first figure drawings will likely feel inadequate, and that’s perfectly normal. Don’t allow self-doubt to halt your progress. View these early attempts not as failures, but as essential stepping stones in your learning process.
Persistence is key. The more you practice, the quicker you’ll overcome these hurdles and begin to see tangible improvements in your ability to capture form and proportion. Embrace the challenge!
Drawing from Life: The Core Principle
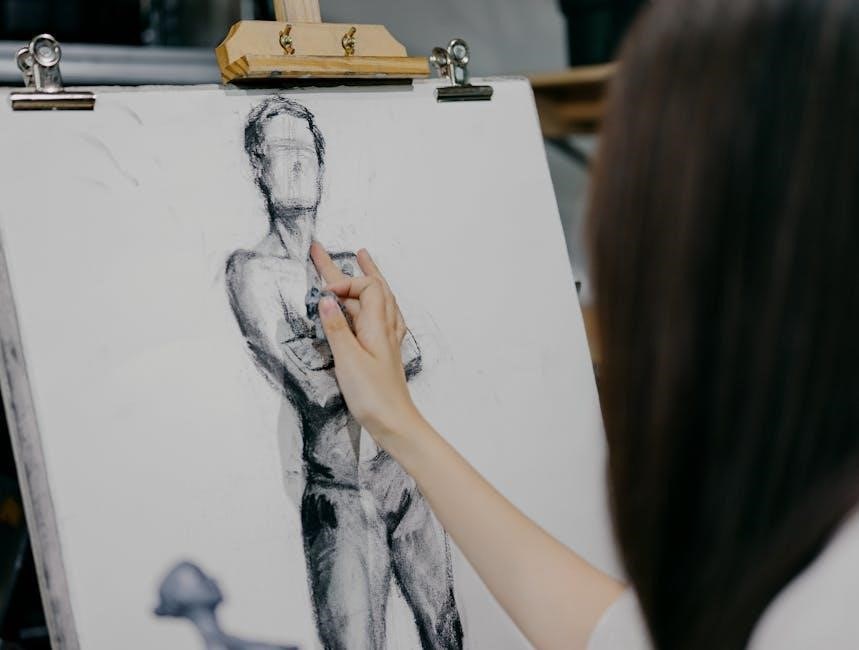
Direct observation is paramount. Consistently drawing from life – people in parks, everyday scenes – forms the bedrock of figure drawing skill. This practice cultivates a deeper understanding of anatomy, movement, and spatial relationships than relying solely on photographs.
Seek out figure drawing classes if possible. Immersing yourself in a life drawing environment accelerates learning and provides invaluable feedback. Life is the ultimate teacher!
Essential Resources for Learning
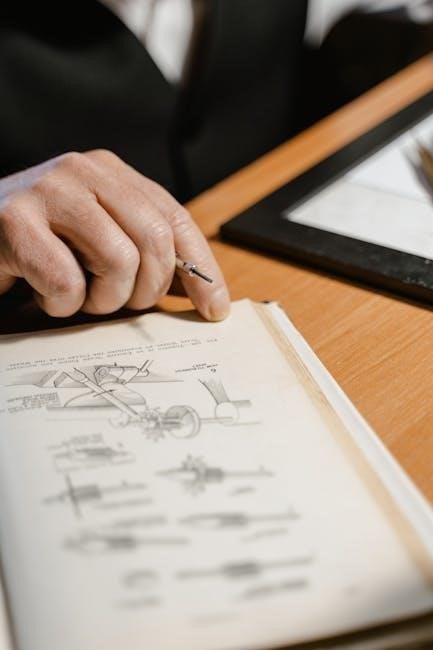
Key texts include Glen Vilppu’s manual, Michael Hampton’s Figure Drawing: Design and Invention, and Loomis’s Fun with a Pencil for foundational knowledge.
Recommended Books: Glen Vilppu’s Manual
Glen Vilppu’s drawing manual is a highly recommended resource for aspiring artists, offering a comprehensive approach to figure drawing and anatomy. It meticulously breaks down complex forms into simpler, manageable shapes, fostering a deeper understanding of structure.
Vilppu’s method emphasizes observation and construction, guiding students through the process of building figures from the skeleton outward, ensuring accuracy and believability. The manual’s detailed illustrations and clear explanations make it invaluable for both beginners and experienced artists seeking to refine their skills.
Recommended Books: Michael Hampton’s Guide
Michael Hampton’s “Figure Drawing – Design and Invention” is a cornerstone resource for artists focused on dynamic figure work. Unlike strictly anatomical approaches, Hampton’s guide prioritizes understanding form through simplified shapes and planes, emphasizing design principles.
This book excels at teaching how to ‘invent’ figures convincingly, moving beyond rote copying to create compelling poses and silhouettes. It’s particularly valuable for those seeking to develop a strong sense of volume and weight in their drawings, fostering a more expressive style.
Recommended Books: Loomis’s Techniques
Andrew Loomis’s books, particularly “Fun with a Pencil” and “Drawing the Head and Hands,” remain incredibly influential for aspiring artists; Loomis’s approach is systematic and accessible, breaking down complex forms into manageable, constructive principles.
He emphasizes understanding structure and proportion, teaching artists to build figures and objects from basic geometric shapes. His clear illustrations and step-by-step instructions make his techniques ideal for beginners, providing a solid foundation in drawing fundamentals and observational skills.

The Process of Breaking Down Objects
Begin with light sketching to simplify objects into basic shapes, then incrementally add detail. Avoid drawing too hard initially and skipping this crucial phase.
Light Sketching and Simplification
The initial stage involves a delicate, light sketch, focusing on capturing the object’s essence through its most fundamental shapes. Resist the urge to immediately define details; instead, prioritize establishing the overall structure and proportions. This simplification process is paramount, allowing you to build a solid foundation before layering complexity.
Think of it as constructing with building blocks – start with the largest, most obvious forms, and gradually refine them. A gentle touch with your pencil ensures flexibility for adjustments, preventing commitment to premature details.
Adding Detail Incrementally
Once the foundational shapes are established, begin adding detail in small, manageable increments. Avoid overwhelming yourself by attempting to render everything at once. Focus on refining forms, defining edges, and suggesting textures gradually. This layered approach allows for continuous evaluation and correction throughout the process.
Each added detail should build upon the previous layer, enhancing the overall form and realism. Remember, patience is key; incremental progress yields more accurate and compelling results than rushed execution.
Avoiding Common Beginner Mistakes
New artists frequently fall into predictable traps. Drawing too hard initially restricts flexibility and makes corrections difficult. Skipping the crucial shape breakdown phase leads to inaccurate and stiff renderings, hindering understanding of form. Ignoring proportions results in distorted figures and objects lacking believability.
Consciously address these pitfalls by sketching lightly, prioritizing simplification, and consistently checking measurements. Overcoming these hurdles accelerates learning and fosters a stronger foundation.

Anatomy for Artists
Understanding skeletal and muscular structures is paramount; knowing anatomy reveals the shapes underlying the human form, enabling accurate and compelling figure drawing.
Understanding Skeletal Structure
A solid grasp of the skeleton is foundational for artists, providing the internal framework upon which all forms are built. It’s surprising how little we truly know about the shapes within our own bodies!
Learning the bones – their proportions, connections, and how they influence surface forms – is essential. Don’t just memorize; visualize how the skeletal structure dictates movement and posture.
This knowledge allows for more believable and dynamic figure drawing, moving beyond superficial representation to a deeper understanding of the human form.
Muscular Anatomy and Form
Beyond the skeleton, understanding muscular anatomy is vital for conveying realistic form and movement. Muscles aren’t just shapes on top of bones; they wrap around, influence, and are influenced by the skeletal structure.
Study how muscles attach, their lines of pull, and how they change shape during contraction. Knowing this allows you to depict believable weight, tension, and dynamic poses.
Anatomy isn’t rote memorization, but a visual understanding of how form functions.
Proportions and Measurements
Accurate proportions are fundamental to believable figure drawing. The human body isn’t random; it adheres to consistent ratios and measurements. Learning these establishes a solid foundation before adding detail.
While variations exist, understanding the “ideal” proportions – like the head-to-body ratio – provides a starting point. Observe how different body parts relate in size and position.
Don’t guess! Use visual measurement techniques to ensure accuracy and avoid distortions.
Gesture Drawing
Gesture drawing prioritizes capturing movement and flow with quick sketches, developing a sense of rhythm and dynamic poses—essential for lively figures.
Capturing Movement and Flow
Gesture drawing’s core lies in swiftly recording the essence of a pose, prioritizing action over detail. These quick sketches, often lasting mere seconds, aim to embody the feeling of movement and the energy within the figure.
Focus on the “line of action”—an imaginary line tracing the spine’s curve—to convey weight and direction. Don’t worry about accuracy initially; instead, embrace fluidity and rhythm.
Repeated practice builds an intuitive understanding of how bodies move, translating into more dynamic and believable drawings. It’s about feeling the pose, not just seeing it.
Quick Sketches for Dynamic Poses
Dynamic poses demand rapid execution; limit sketch time to truly capture the energy of the moment. Prioritize the overall gesture—the sense of movement—over precise anatomical detail. Embrace loose lines and exaggeration to amplify the feeling of action.
Focus on the body’s weight distribution and how it shifts during movement.
Don’t be afraid to overlap lines and create a sense of blur, mimicking the speed of the pose. The goal isn’t a finished drawing, but a visual record of the pose’s essence.
Developing a Sense of Rhythm
Rhythm in drawing isn’t about musicality, but the visual flow and harmony within a pose. It’s recognizing the repeating curves and angles that create a pleasing composition. Observe how lines connect and lead the eye through the form.
Gesture drawing cultivates this sense, training you to see the underlying structure and movement.
Think of the pose as a wave, with crests and troughs defined by the body’s contours. Practice simplifying forms to emphasize this rhythmic quality.

Light and Shadow in Instructional Drawing
Understanding value and tone is key to creating depth; shading defines form, influenced by light source placement and intensity.
Mastering this builds realistic depictions.
Understanding Value and Tone
Value, in instructional drawing, refers to the lightness or darkness of a color, independent of its hue. It’s the foundation for creating the illusion of three-dimensionality on a two-dimensional surface. Tone is closely related, often used interchangeably, and represents the overall range of values within an artwork.
Successfully manipulating value and tone allows artists to convincingly depict light and shadow, defining form and creating depth. Recognizing how light interacts with surfaces – highlights, mid-tones, and shadows – is paramount. Careful observation and practice are essential for mastering this crucial aspect of drawing.
Creating Depth and Form with Shading
Shading is the technique of using value – the lightness and darkness of tones – to suggest the three-dimensional form of objects. It’s how we visually communicate how light falls upon a surface, revealing its contours and volume. Mastering shading transforms flat drawings into compelling representations of reality.
By carefully applying darker values to areas in shadow and lighter values to areas hit by light, artists create the illusion of depth. Understanding light sources and their impact is vital for believable shading, enhancing the overall impact of the artwork.
Light Sources and Their Impact
Light sources dictate the entire shading scheme within a drawing, fundamentally shaping how forms are perceived. The position, intensity, and color temperature of light dramatically alter the distribution of highlights and shadows across surfaces. A single light source creates a clear pattern, while multiple sources introduce complexity.
Understanding how light interacts with different materials – smooth, rough, reflective, or absorbent – is crucial. Accurately depicting these interactions lends realism and depth to instructional drawings, enhancing the overall visual narrative.

Perspective Drawing
Perspective establishes spatial relationships, utilizing one, two, or more vanishing points to create realistic depth and dimension within instructional drawings.
One-Point Perspective Basics
One-point perspective employs a single vanishing point on the horizon line, simplifying depth representation. All lines converge towards this point, creating a sense of receding space—ideal for illustrating roads, hallways, or objects viewed head-on.
Understanding this foundational technique is crucial; parallel lines appear to meet, and objects diminish in size as they approach the vanishing point. Mastering one-point perspective provides a solid base for more complex perspective systems, enhancing the realism and spatial clarity of your instructional drawings.
Two-Point Perspective Techniques
Two-point perspective utilizes two vanishing points on the horizon line, offering a more dynamic and realistic depiction of space. Vertical lines remain vertical, while all other lines converge towards one of the two vanishing points, representing objects viewed at an angle.
This technique excels at illustrating corners of buildings or objects, adding depth and dimension. Mastering two-point perspective builds upon one-point principles, enabling artists to create compelling and spatially accurate instructional drawings.
Applying Perspective to Complex Scenes
Complex scenes demand combining one and two-point perspective, layering elements to create believable depth; Establishing a clear horizon line and vanishing points is paramount, guiding the placement of objects within the space.
Consider atmospheric perspective – diminishing detail and contrast with distance – to enhance realism. Careful observation and consistent application of perspective principles transform flat drawings into immersive, spatially coherent instructional illustrations, conveying form and location effectively.
Materials and Tools
Essential tools include varied pencil grades for different values, a quality sketchbook, and erasers/blenders for refinement. Selecting the right materials enhances drawing control.
Pencils: Grades and Uses
Pencil grades are crucial for instructional drawing, ranging from hard (H) to soft (B). Harder pencils (like 2H or 4H) create light, precise lines ideal for initial sketching and construction, laying down foundational shapes. Softer pencils (like 2B, 4B, or 6B) produce darker, richer tones perfect for shading and adding depth.
Experimenting with different grades allows artists to achieve a full range of values, enhancing form and creating realistic effects. A versatile set should include pencils from both ends of the spectrum, enabling flexibility throughout the drawing process.
Sketchbooks: Choosing the Right One
Selecting a sketchbook is vital for consistent practice in instructional drawing. Consider paper weight; heavier weight (60lb/90gsm or higher) resists bleed-through with various media. Smooth paper suits detailed work, while textured paper excels with shading and expressive lines.
Spiral-bound sketchbooks lay flat, simplifying drawing from life. Portrait or landscape orientation depends on preference. Don’t be afraid to experiment – a sketchbook is for learning, so choose one that inspires frequent use and exploration of techniques!
Other Useful Tools (Erasers, Blenders)
Beyond pencils and sketchbooks, erasers and blenders enhance instructional drawing. Kneaded erasers lift graphite gently, ideal for subtle adjustments and highlights. Vinyl or plastic erasers offer precise removal for clean lines. Blending stumps or tortillons smooth shading, creating tonal transitions and soft forms.
Experiment with different tools to discover what suits your style. Remember, these aids support the core skills – observation, shape construction, and value understanding – not replace them!
Common Mistakes to Avoid
Beginners often draw too hard, skipping crucial shape breakdowns and ignoring proportions. Light sketching and foundational forms are key to success!
Drawing Too Hard Initially
Many aspiring artists fall into the trap of pressing down firmly with their pencils right from the start. This is a significant impediment to progress. A light touch allows for easy corrections and adjustments as you build the form.
Remember, the initial stages are about establishing structure and proportions, not committing to dark, definitive lines. Embrace the freedom of a gentle hand, enabling you to refine shapes and avoid irreversible errors.
Think of it as building a framework before adding the details – a delicate foundation is essential for a strong structure!
Skipping the Shape Breakdown Phase
A common mistake beginners make is diving straight into detail without first simplifying the subject into fundamental geometric shapes. This shortcut hinders understanding and accuracy. Constructing forms from basic shapes – cubes, spheres, cylinders – provides a solid structural foundation.
This process clarifies proportions and relationships, making complex subjects manageable.
By neglecting this crucial step, drawings often appear flat, distorted, and lack convincing form. Embrace simplification; it’s the key to realistic representation!
Ignoring Proportions
Accurate proportions are paramount in instructional drawing; overlooking them leads to unrealistic and unsettling results. Understanding the relative size and placement of body parts – or any object’s components – is essential for believable representation.
Anatomy plays a vital role here, revealing the underlying structure and relationships.
Careful observation and measurement, even rough estimations, are crucial. Don’t assume; verify! Ignoring proportions demonstrates a lack of understanding of the subject’s form and structure.

Developing Your Style
Experimentation with techniques is key to finding your artistic voice; continuous learning and refinement will foster growth and a unique, personal style.
Experimenting with Different Techniques
Embrace diverse approaches to broaden your artistic horizons. Don’t limit yourself to one method; explore varied shading styles – hatching, cross-hatching, blending – to discover what resonates with your vision.
Try different pencil grades for varying values and textures. Consider incorporating new tools like charcoal or ink.
Deliberately deviate from established norms, pushing boundaries to unlock unique expressive possibilities. This exploration is vital for cultivating a distinctive artistic identity and personal style.
Finding Your Artistic Voice
Developing a unique style isn’t about imitation, but about synthesizing learned techniques with personal expression. Analyze artists you admire, but don’t replicate; instead, identify why their work resonates.
Infuse your drawings with your personality, preferences, and interpretations.
Continuous self-assessment and experimentation are key. Your artistic voice emerges through consistent practice, embracing imperfections, and confidently expressing your individual perspective.
Continuous Learning and Improvement
Artistic growth isn’t a destination, but a lifelong journey of refinement. Embrace constructive criticism and actively seek opportunities to expand your knowledge base.
Explore new techniques, mediums, and subject matter to challenge your comfort zone.
Regularly revisit foundational principles – anatomy, perspective, light – to solidify understanding. Dedication to consistent practice and a willingness to learn are paramount for sustained improvement.